Navigation: Categories & Products > Manage Products Overview >
Add a New Product


|
Navigation: Categories & Products > Manage Products Overview > Add a New Product |
|
To Add a New Product, follow the steps:
1. Click Add a New Product, as shown in the Figure 2-4-1 below.
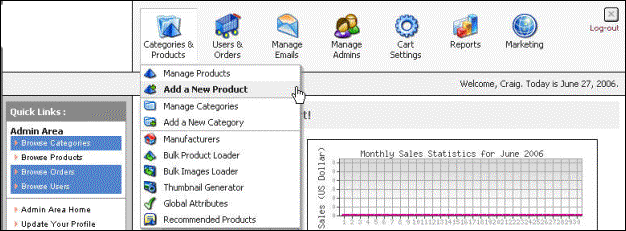
Figure 2-4-1: Add a New Product
The Product (Insert) page opens. By default, the Product (Insert) page opens under the Product Info tab, as shown in the Figure 2-4-2 below.
Note: You can also directly open the Product (Insert) page under the Product Info tab, by clicking on Add a New Product link in the Admin Area Home page.
2. Product Categories: Use this section to organize your products by selecting product categories.
a. Main (primary) Category: Select the primary (main) product category from the drop down menu.
b. Secondary Categories: Select the secondary product category by clicking on it.
Note: You can select multiple secondary categories by holding the Ctrl button on your keyboard and then clicking on the categories.
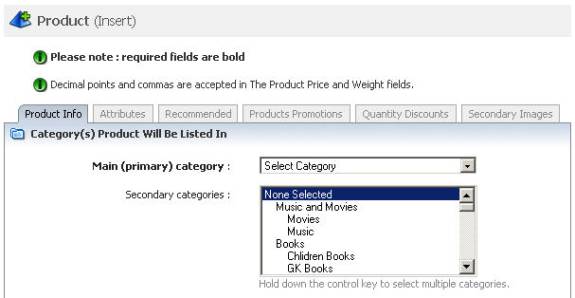
Figure 2-4-2: Product Categories
3. Product ID / Name: Enter the following information:
a. Product ID: All products need to have an ID associated with them for easy look-up and identification. It is a unique identifier of the product in the store. This ID can also be used for Bulk Loading images via FTP to your cart.
b. Product Name (title): Type the name of the product.
c. Meta Keywords: Keywords to be used for searching this category. This may also help with search engine positioning.
d. Meta title tag: The customer will view the Meta title tags at the top of the browser window. Meta title tags help the search engines to decide your web page relevancy for the keyword phrases. You can enter the title of the product name as Meta title tag.
e. Product manufacturer: Select the Product Manufacturer Name from the drop-down menu to search products by the product manufacturer. If you don’t want to search the product by the manufacturer name, let it remain on Do not assign manufacturer. By default, the Do not assign manufacturer is selected in the drop-down menu.
f. Priority: Use priority to have products listed higher within Your cart. A higher number shall have a higher product listing. You can use either positive or negative numbers: For example: 50, -20, 4.
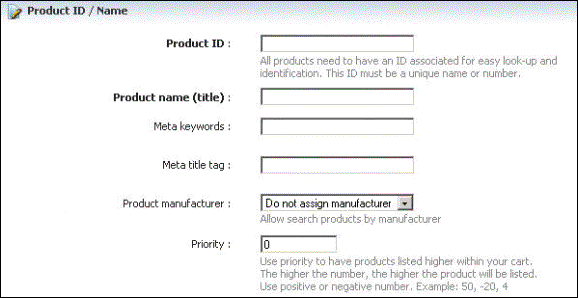
Figure 2-4-3: Product ID / Name
4. Properties: Enter the following information:
a. Item Price: Type a numerical value with dot-separated decimal (i.e 1.45, 0.34). Do not enter any currency symbols. We have also incorporated a feature that allows you to show or hide the unit price. Check the Call For Price box next to the Item Price field, to hide a product’s price.
b. Is this product is a Taxable Item: Check the box for calculating the tax for this product to the total amount of user’s order. If you uncheck the box, then, the tax for this product will not be added. By default, the box is checked.
c. Sale Price: If this item is on sale, enter the Sale Price.
Note: The sale price will appear in red color, below the retail (original) price indicating this item is on sale or has been discounted.
d. Free Shipping: Check the box if there is no shipping charges for the product. Otherwise, let it remain unchecked if there are shipping charges for the product.
e. Unit Weight (lbs): Enter the weight for the product.
f. Shipping Price at Product Level: By default, the cart assumes all shipping prices are calculated at the product level. If you enter in 0.00 (which is the default) the cart will use the Global Shipping Methods to calculate a shipping price, if an amount is entered, it will use the price entered and NOT use the global method.
IMPORTANT: If you are using a real-time shipping method, all items in your store will need to have a product weight for a shipping price to be presented to your customer.
Note: Unit Weight is not required, if free shipping is selected for the product.
g. Shipping price for Standard Shipping: Enter the shipping charges for the product. If a price is entered in this field, the shipping management settings for this product will not be considered.
Note: Shipping Price is not required, if free shipping is selected for the product. You can also enter 0.00 in this field for free shipping.
h. Inter pack / Case pack: Enter the number of Inter pack and Case pack if applicable for product. Case pack must indicate total number of product items in the case. This feature will only be present if you have activated it in Wholesale Settings.
i. Minimum/Maximum Quantity in Order: Specify the minimum and maximum quantity a customer can order for a product, that may be added to the cart. By default, the minimum order for a product is 1.
Note: Leave the field blank if you don't want to use this feature.
j. Is Product Available: Check the box if the product is available. Otherwise, let it remain unchecked if it is not available. By default, the box is checked.
k. Mark Product as Hot Deal: Check the box to mark the product as a Hot Deal. Otherwise, let it remain unchecked if it is not a Hot Deal.
Note: Hot Deal products are always first on product catalog pages.
l. Show Product On Home Page: Check the box to show the product on the Home Page. Otherwise, let it remain unchecked to hide the product on the Home Page.
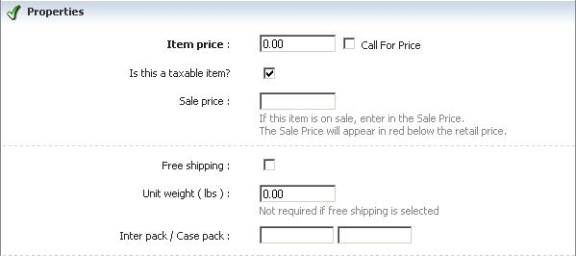
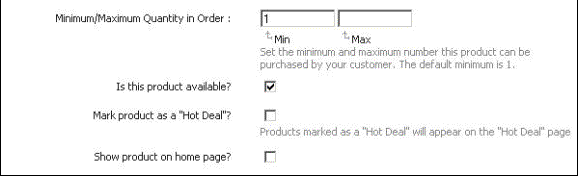
Figure 2-4-4: Properties
5. Inventory Control: Click on ![]() in the extreme right of Inventory Control to expand it, and then enter the following information:
in the extreme right of Inventory Control to expand it, and then enter the following information:
a. Track Inventory for this item: Check the box to remove the product automatically from the cart once the product is out of stock. Otherwise, let it remain unchecked if you don't want Inventory Tracking for the product.
b. Number of items in inventory: If you select the Inventory Tracking, enter the number of products you want to have in the inventory. The system will automatically decrease this value any time a user will purchase a product from your store.
c. Stop sale if the number of items is less: If you select the Inventory Tracking, specify a value after which the system will automatically stop product sale when the number of items in inventory will be less than that value you will enter here.
d. If inventory reaches allowed minimum: If a product reaches the minimum specified value in the inventory, select from the drop-down menu Do not display item on user site if you want to remove the product automatically from the cart or Out of Stock message if you want to display a message to a customer.
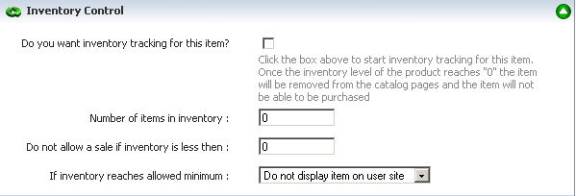
Figure 2-4-5: Inventory Control
6. Quick Overview: Click on ![]() in the extreme right of Quick Overview to expand it, and then, enter the overview for the product in plain text.
in the extreme right of Quick Overview to expand it, and then, enter the overview for the product in plain text.
Note: HTML is not allowed in Quick Overview. The overview information may also appear on the Catalog pages.
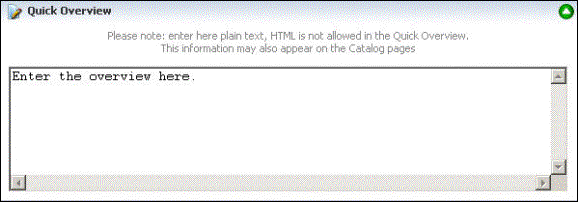
Figure 2-4-6: Quick Overview
7. Detailed Description: Enter the detailed description for the product in plain text.
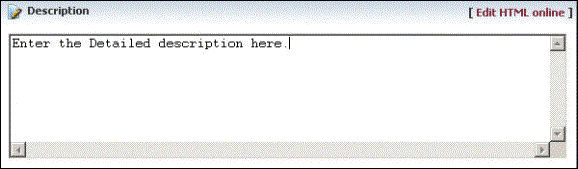
Figure 2-4-7: Description
8. You can also create an eye-catching description, by clicking Edit HTML Online in Description, as shown in Figure 2-4-8 below.
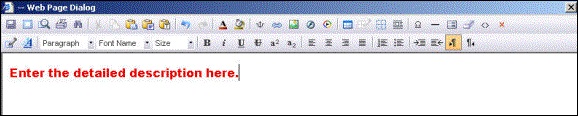
Figure 2-4-8: Online HTML Editor
9. Product’s Image Uploading: Click Browse and navigate to the image that you would like to upload for the product. The images only can be in JPG and PNG format.
Note: To add more than one image under Product’s Image Uploading, click the Save Changes button and select Edit This Product on the next page. Then, select the Secondary Images under the product. To know more about Secondary Images, click here.
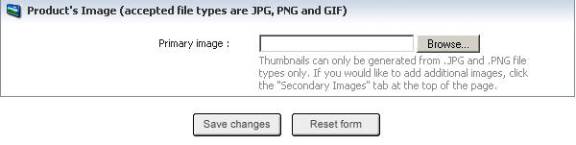
Figure 2-4-9: Product’s Image Uploading
Note: You can also Assign Existing Global Attributes with a product, so that it would appear every time you add a product. To know how to Assign Existing Global Attributes with a product, click here.
To know how to create new global attributes, click here.
10. If you want to reset the form, click on the Reset form button.
11. Click Save changes button to save the details about the product. You will get a confirmation message when the new product has been successfully added.
Note: Click on the links below to know more about the Attributes, Recommended Family, Product Promotions, Quantity Discounts and Secondary Images for a product.