Navigation: »No topics above this level«
Getting Started Overview


|
Navigation: »No topics above this level« Getting Started Overview |
|
Your cart is a premier eCommerce solution that enables business of all sizes to create, manage and grow their on-line business. The following guide provides you the facility to set up a basic storefront. These steps will assist you in providing Your cart with basic information necessary to conduct transactions. We recommend you to complete these steps first before you begin adding products to store.
1. Enter the Username and Password, as shown in the Figure 1-1-1 below and click on the Login button. This information may have been provided to you via e-mail, or you may have set this up during installation.
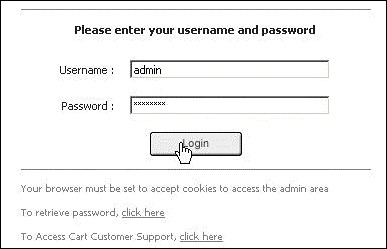
Figure 1-1-1: Login Page
2. Admin Area Home page will open, as shown in the Figure 1-1-2 below.
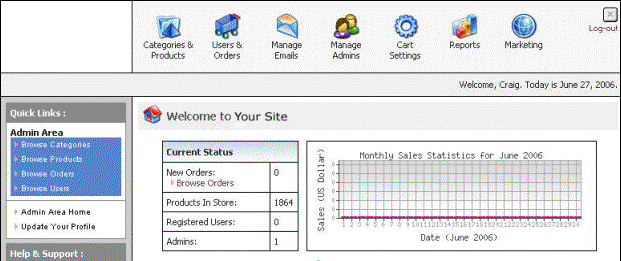
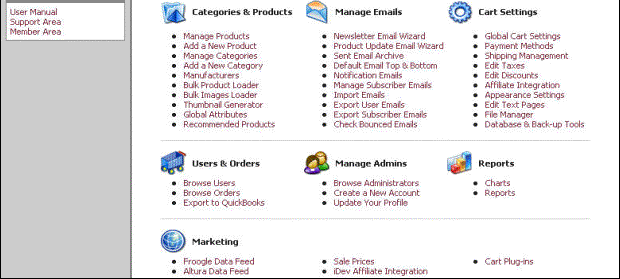
Figure 1-1-2: Admin Area Home page
3. Click Global Cart Settings in Cart Settings.
4. In Global Cart Settings page:
a. Click Company Information and enter all relevant information about your company.
b. Click Global Site Settings and enter information about administration e-mails, support e-mails, site name and URL information. Keep in mind this information will be presented to your customers from the cart and via e-mail. The e-mail address you enter is not used for admin notifications, it is only presented to the customer. Admin notifications are set up through the Manage Admins area.
5. Click Payment Methods in Cart Settings.
6. In Payment Methods (Quick Setup) page, select the payment methods you will be accepting. Be sure to click the edit icon ![]() to make adjustments and enter in text for the cart.
to make adjustments and enter in text for the cart.
7. Click Shipping Management in Cart Settings.
8. In Shipping Management page, select the shipping method you will allow your customers to use. Your cart has the ability to get real-time rates from Fed-Ex, UPS and USPS. You can also create your own custom methods.
9. Click Edit Taxes in Cart Settings (if applicable).
10. Select the states / countries where you will be charging tax and enter the rate.
11. Click Appearance Settings in Cart Settings.
12. In Appearance Settings page:
a. Edit Site Header and Footer: You can enter HTML, which will appear on the top and bottom of your site, or follow the directions to have your logo appear.
b. Edit Site Home Page: Enter the information to appear in the middle section of your home page.
After you complete these steps, you can enter your product into the Your cart system. You can do this individually or by using the Bulk Product Loader. We suggest reviewing the user manual before you begin.