Navigation: Manage Emails > Manage Emails Overview >
Newsletter Email Wizard


|
Navigation: Manage Emails > Manage Emails Overview > Newsletter Email Wizard |
|
This section helps you to edit pregenerated HTML and TEXT versions of your newsletter.
To edit pregenerated HTML and TEXT versions, follow the steps:
1. Click Newsletter Email Wizard, as shown in the Figure 4-1-1 below.
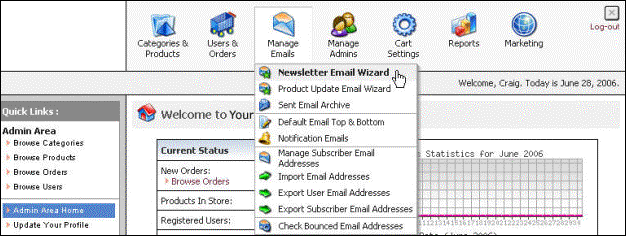
Figure 4-1-1: Newsletter Email Wizard
The Newsletter Email Wizard (step 1 of 3) page will open.
Note: You can also directly open the Newsletter Email Wizard (step 1 of 3) page, by clicking on the Newsletter Email Wizard link in the Admin Area Home page.
2. Newsletter Email: Enter the following information:
a. Subject: Type the subject of the letter.
b. From Name: Type the name of the Sender.
c. From Email: Type the email address of the Sender.
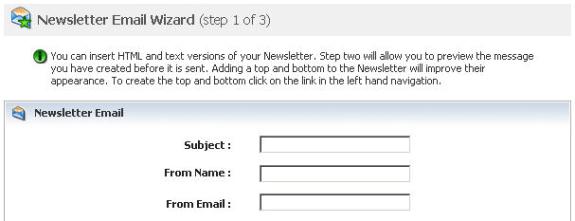
Figure 4-1-2: Newsletter Email
3. Content for HTML Email: You can edit the HTML Email content in plain text.
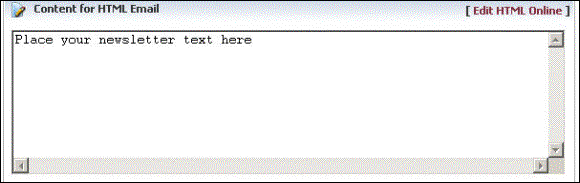
Figure 4-1-3: Content for HTML Email
4. Further, you can create an eye-catching HTML Email content, by clicking Edit HTML Online in Content for HTML Email, as shown in the Figure 4-1-4 below.

Figure 4-1-4: Online HTML Editor
5. Content for Text Email: You can edit the Text Email content in plain text.
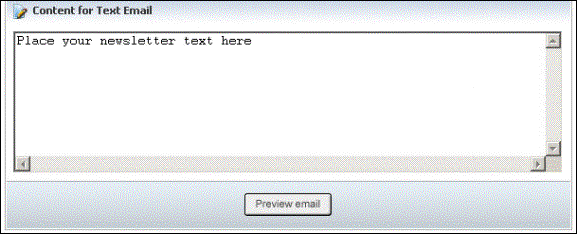
Figure 4-1-5: Content for Text Email
6. After Editing the HTML and Text Email, click Preview Email button.
The Newsletter Email Wizard (step 2 of 3) page will open, as shown in the Figure 4-1-7 below.
Note: In Newsletter Email Wizard (step 2 of 3) page, you can preview both the HTML and TEXT versions of your newsletter. Adding a top and bottom to these emails will improve their appearance.
7. To add a top and bottom, click Emails Top & Bottom in the left navigation, as shown in the Figure 4-1-6 below.
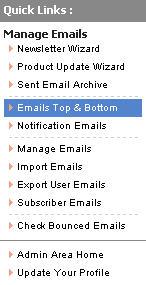
Figure 4-1-6: Emails Top & Bottom
Note: Clicking Emails Top & Bottom in the left navigation will open the Top and Bottom Email Templates page. Enter HTML and Text Email Top & Bottom and then click Save changes button to update the information. To know more about Emails Top & Bottom, go to Default Email Top and Bottom section.
8. In the Newsletter Email Wizard (step 2 of 3) page, you can also request for a Test Email, by filling the Test Email Address box and then clicking on the Send test email button.
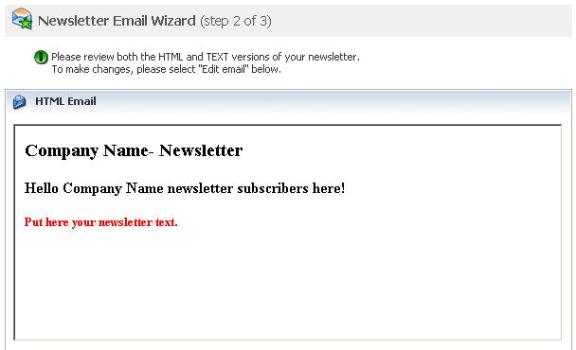

Figure 4-1-7: Newsletter Email
9. If you still want to make changes, click on the Edit email button. You will then be taken back to the Newsletter Email Wizard (step 1 of 3) page.
10. You can send the email immediately by clicking on the Send email button.
A pop up appears asking for confirmation, as shown in the Figure 4-1-8 below.
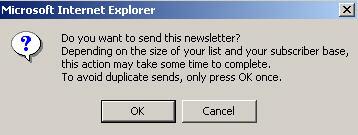
Figure 4-1-8: Newsletter email sending confirmation
11. Confirm sending newsletter email, by clicking OK button.
Note: To avoid duplicate sends, click OK button only once.
The Newsletter Email Wizard (step 3 of 3) page will open. You will get a confirmation message that the Newsletter Email has been successfully sent.