Navigation: Manage Admins > Administrator Overview >
Create a New Administrator Account


|
Navigation: Manage Admins > Administrator Overview > Create a New Administrator Account |
|
To create a new administrator account, follow the steps:
1. Click Create a New Account, as shown in the Figure 5-1-1 below.

Figure 5-1-1: Create New Administrator Account
The Site Administrator (insert) page will open, as shown in the Figure 5-1-2.
Note: You can also directly open the Site Administrator (insert) page, by clicking on Create a New Account link in the Admin Area Home page.
2. Basic Information & Security: Enter the following information:
a. Full Name: Type the full name of the person.
b. Email: Type his email address.
c. Email type: Select from the drop down menu the Email type (Plain text messages or HTML-enriched messages).
Note: You can also select whether the person will receive invoice notifications, out of stock messages, new user registration notifications or all by checking the boxes.
d. Username: Enter a unique user name.
e. Password: Enter the password for this username.
f. Password Confirmation: Re Type the password.
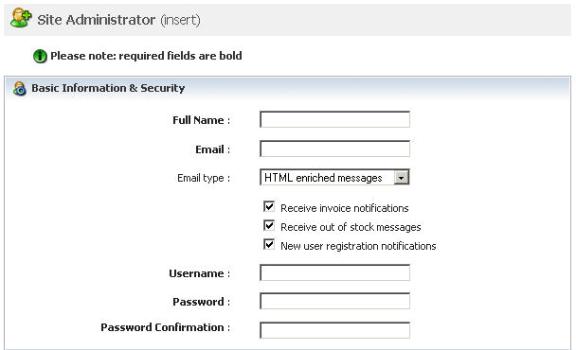
Figure 5-1-2: Basic Information
3. Administrator Privileges: You can also select the level of access you would like to give to this administrator by clicking the check boxes. You must select at least one privilege by clicking in the box next to it.
Note: Select Yes from the Account Active drop-down menu to activate this administrator account whereas select No to de-activate the account.
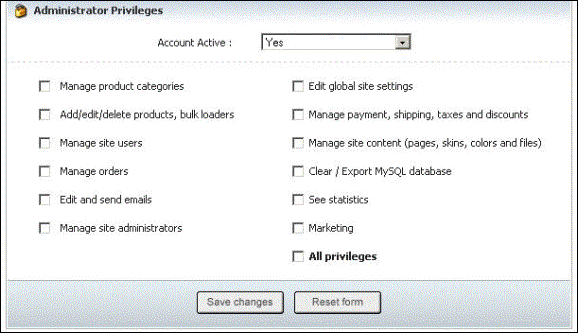
Figure 5-1-3: Administrator Privileges
4. If you want to cancel or start again, click on the Reset form button.
5. Click Save changes button to save details about the new administrator account. You will get a confirmation message that the new administrator account has been successfully created.