Navigation: Categories & Products > Manage Categories Overview >
Add a New Category or Subcategory


|
Navigation: Categories & Products > Manage Categories Overview > Add a New Category or Subcategory |
|
To Add a New Category or Subcategory, follow the steps:
1. Click Add a New Category, as shown in the Figure 2-1-1 below.

Figure 2-1-1: Add a New Category
The Category (Insert) page opens.
Note: You can also open the Category (Insert) page directly, by clicking on Add a New Category link in the Admin Area Home page.
2. Parent Category: Select Category Root to create a new category, as shown in the Figure 2-1-2 below.
Marketing Tip: Keep you category names very short and specific
Note: Select any parent category from the available categories, to add or create a child category (Subcategory) under it.
You can also add a subcategory, by clicking Add Subcategory ![]() icon from Manage Catalog Categories page.
icon from Manage Catalog Categories page.
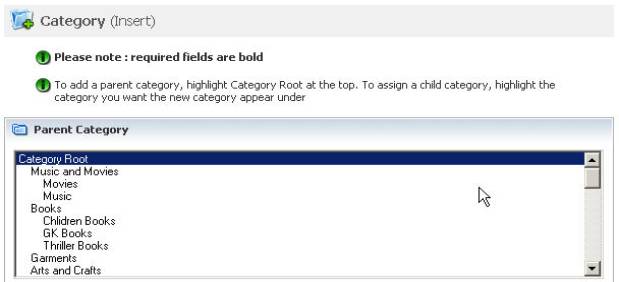
Figure 2-1-2: Parent Category
3. Category Properties: Enter the following information:
a. Category Name: Type the name of the category.
b. Category Key: Used for bulk uploading of products with the bulk loader feature. It may be the same as the category name, but without spaces (example: Music_and_Movies).
c. Meta Keywords: Keywords that maybe used by search engines to list within their site.
d. Is Category Visible to Users: Uncheck the box if you don’t want this category visible to the user. Otherwise, let it remain checked. By default, the box is checked.
e. List Subcategories on Catalog Page: Check the box if you want to list subcategories on the Catalog Page. Otherwise, let it remain unchecked.
f. Priority: Use priority to have products listed higher within Your cart. You can select this on a scale of 1 to 10, where 1 is given the highest priority. The higher the number, the higher the product will be listed.
Note: All categories at the same level in a catalog tree are sorted by priority.
Categories with the same priority are sorted alphabetically.
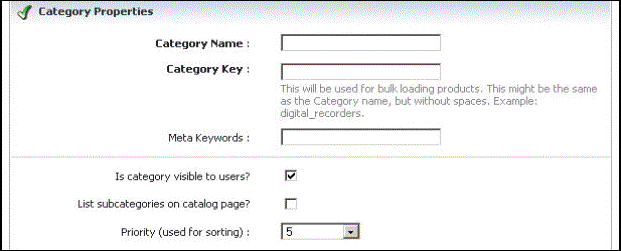
Figure 2-1-3: Category Properties
4. Category Description: Type a description for the category, as shown in the Figure 2-1-4 below.
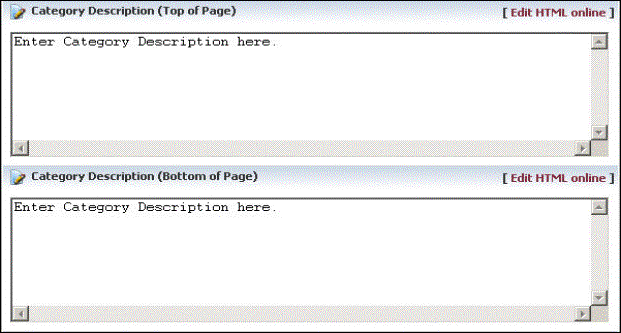
Figure 2-1-4: Category Description
5. You can also create an eye-catching description, by clicking Edit HTML Online in Category Description, as shown in Figure 2-1-5 below. This field allows you to enter HTML-enriched category description.

Figure 2-1-5: Online HTML Editor
6. Category Image: Click Browse and navigate to the image that you would like to upload for the category. The images can be in JPG, PNG and GIF format.

Figure 2-1-6: Category Image
7. If you want to reset the form, click on Reset form button.
8. Click Save changes button to save the details about the category. You will get a confirmation message that the new products category has been successfully created.