Navigation: Cart Settings > Order Settings Overview > Enable/Add Gateway >
Setting Up Authorize.net


|
Navigation: Cart Settings > Order Settings Overview > Enable/Add Gateway > Setting Up Authorize.net |
|
Steps for setting up an Authorize.net account in the cart.
1) Get an Authorize.net account.
Your cart uses the ADC Direct response method, Version : 3.0 ( Simple Integration Method )
2) Login to your Authorize.net and go to Settings and Profiles area and look under the Security table. Specifically, make sure Card Code Verification and Address Verification System (AVS) are set as you would like them. These settings allow you to control security on your account and may help in preventing fraudulent transactions from being placed on your cart.
3) Logout of Authorize.net and login to the Your cart Management area.
4) Go to Cart Settings >> Payment Methods and activate the Authorize.net gateway.
Important: You will need to have an SSL (Security Certificate) set up to transfer credit card information securely to the gateway.
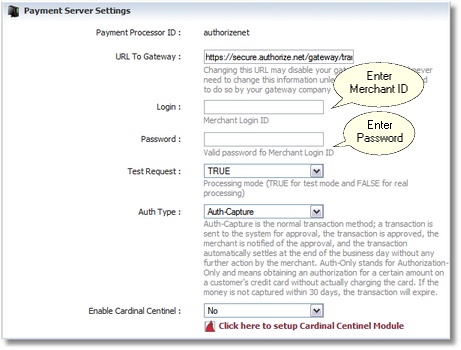
5) Enter in your Authorize.net Login and Password.
6) If you are going to run a test transaction, set Test Request to True. Once testing is complete, make sure you set this back to False. Any of the following card numbers can be used to run test transactions. Please note that these numbers do not represent real card accounts; they will return a decline in live mode, and an approval in test mode. Any expiration dates after the current day's date can be used with these numbers.
370000000000002 - American Express
6011000000000012 - Discover
5424000000000015 - MasterCard
4007000000027 – Visa
7) Set Auth Type to AUTH_CAPTURE or AUTH ONLY depending on the how you would like Authorize.net to handle your transactions. ( default is AUTH_CAPTURE )
8) Make sure your currency code is set to USD. At this time Authorize.net is only accepting transactions in US DOLLARS.
9) Enable the credit cards you have set up on the Authorize.net system. Do not enable credit cards that are not associated with your Authorize.net account, this will only cause confusion with your customers.
10) Enter in the messages you would like to appear on the both the payment and thank-you page.
11) Click save settings and log-out.