Navigation: Cart Settings > Content Management Overview >
Add a New Text Page


|
Navigation: Cart Settings > Content Management Overview > Add a New Text Page |
|
You can use this section to add and manage the custom page of Your cart.
To add a new custom text page on Your cart, follow the steps:
1. Click Edit Text Pages, as shown in the Figure 6-47-1 below.

Figure 6-47-1: Edit Text Pages
2. The Site Text Pages will open, as shown in the Figure 6-47-2 below.
Note: You can also open the Site Text Pages directly by clicking on Edit Text Pages link in the Admin Area Home page.
It is recommended not to delete the four pre-defined text pages (Terms and Conditions, About Us, Contact Information and How to Enable Cookies).
You can also edit and delete the text pages from the Site Text Pages. To know more about editing and deleting a text page, click on each of the links.
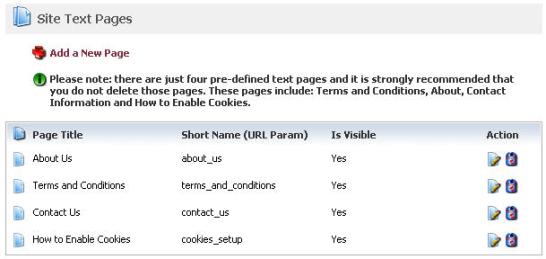
Figure 6-47-2: Site Text Pages
3. In the Site Text Pages, click on Add a New Page link.
The Site Page (insert) page will open.
Note: You can also change the Appearance Settings of that site page by clicking edit Appearance Settings (Default Images, Layout and Colors) link on top of the Site Page (insert) page.
4. Common Page Information: Enter the following information:
a. Short Name: Enter a name for the page.
b. Page Title: Enter a page title for the menu.
c. Is This Page Visible: Select Yes from the drop down menu if you want this page to be visible to the users. Selecting No will hide the page.
d. Priority: Rank a page within your website using the priority feature. You can select this on a scale of 1 to 10, where 1 has the highest priority. The higher the number, the higher the page will be listed.
Figure 6-47-3: Common Page Information
5. Link Locations: Select Yes from the drop down menu for Top or Bottom, wherever you want the link locations and choose No for the other option, as shown in the Figure 6-47-4 below.

Figure 6-47-4: Common Page Information
6. Page HTML: Enter text in the Page HTML box.
7. You can also create an eye-catching description by clicking Edit HTML Online in Page HTML.
Figure 6-47-5: Page HTML
8. If you want to cancel or start again, click on Reset form button.
9. Click Save changes button to save details about the new text page. You will get a confirmation message that the new page has been added successfully.