Navigation: Cart Settings > Global Cart Settings Overview > Site Local Settings Overview >
Add a Language


|
Navigation: Cart Settings > Global Cart Settings Overview > Site Local Settings Overview > Add a Language |
|
You can use this section to add a language template.
To add a language template, follow the steps:
1. Open the Site Local Settings page.
2. Click on the Language tab on top of the page.
The Language page opens, as shown in the Figure 6-16-1 below.
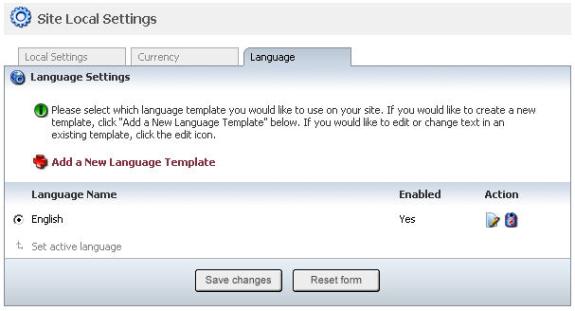
Figure 6-16-1: Language page
Note: You can set a language as an active language by clicking on the radio button and then clicking on the Save changes button.
3. Click Add a New Language Template link under Language Settings to open Add / Create Language page, as shown in the Figure 6-16-2 below.
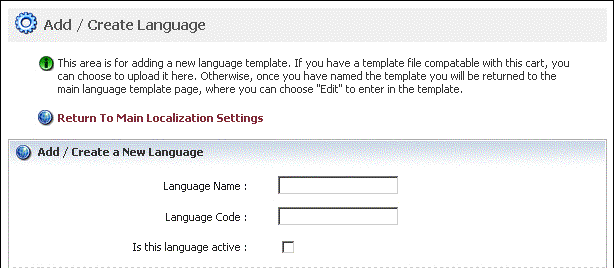
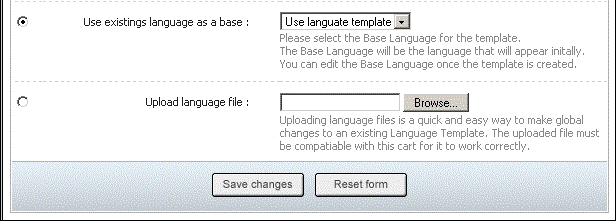
Figure 6-16-2: Add / Create Language page
4. Scroll down to Add/ Create a New language and enter the following information.
a. Language Name: Enter the name of the Language.
b. Language Code: Enter the Language Code.
c. Is this language active: Check this Box to make the language you are adding as an active language for the site.
d. Use existings language as a base: Select the base language for the template from the drop-down menu.
Note: Base Language will be the language that will appear initially. You can edit the Base Language once the template is created.
e. Upload language file: Click on Browse to upload the language file from your local computer. The uploaded file must be compatible with this cart for it to work correctly.
5. If you want to reset the form, click on the Reset form button.
6. Click Save changes button to update the information.
You can view the confirmation message on top of the Add / Create Language page, as shown in the Figure 6–16-3 below.
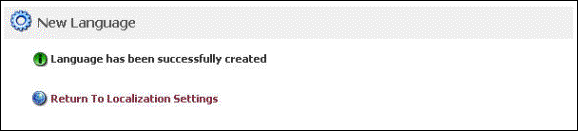
Figure 6-16-3: Language Confirmation Page